Basic Archery Drills to Improve Your Accuracy
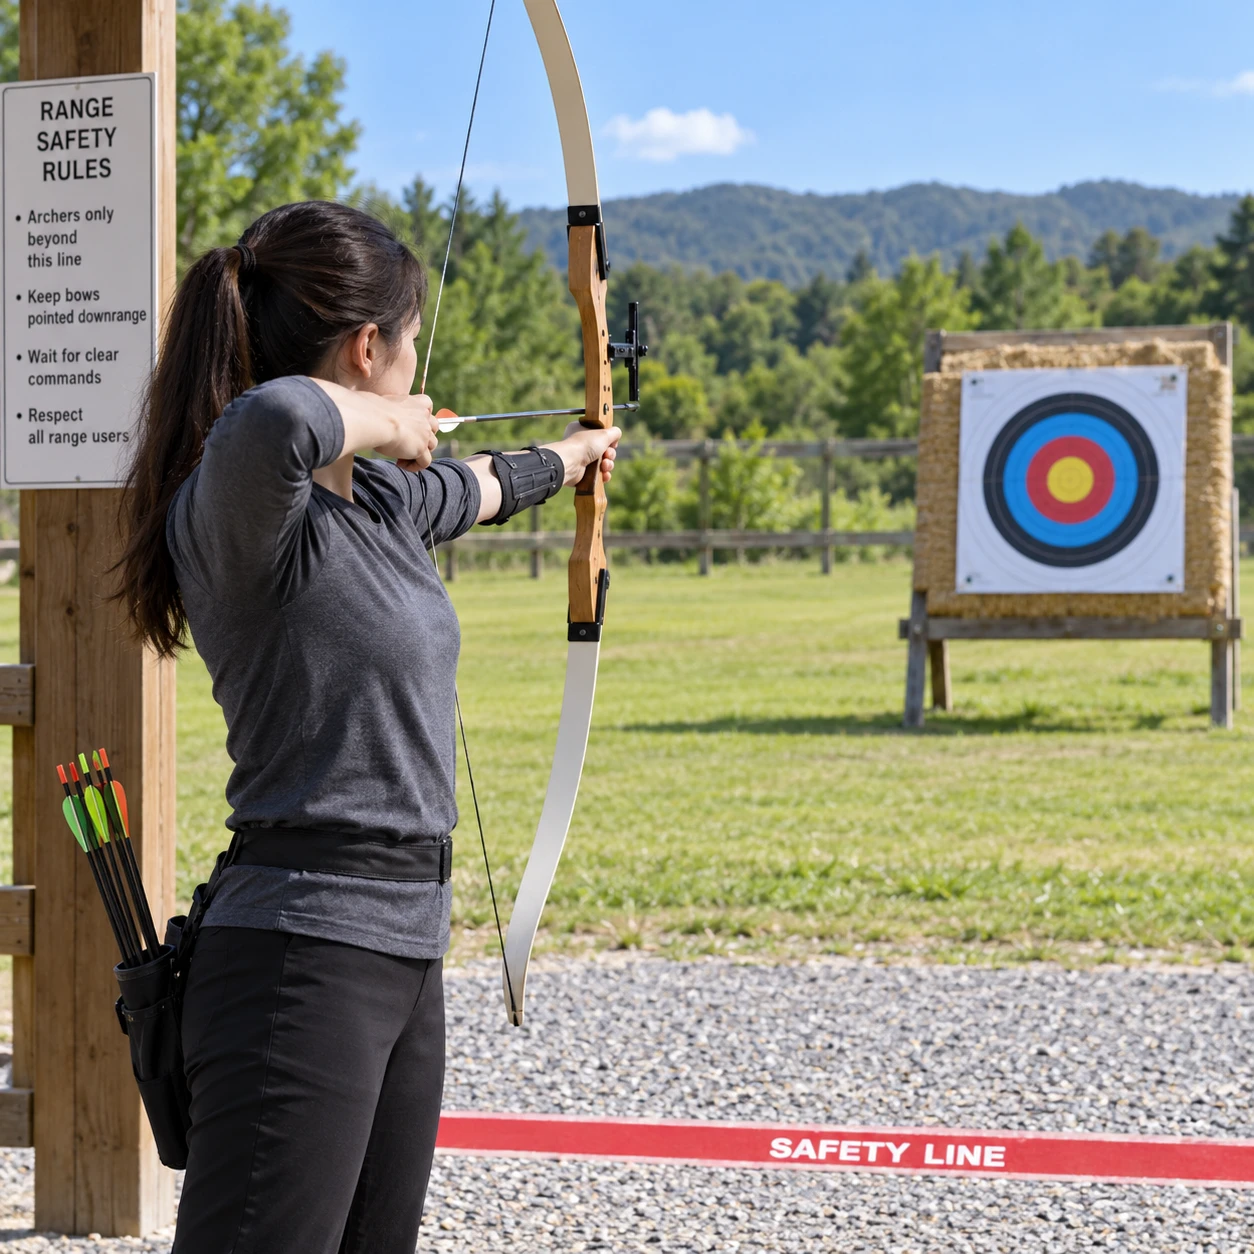
Accuracy in archery comes from repeating a sound shot, not from trying to force every arrow into the center. A few focused drills can help beginners develop a stable archery stance, consistent anchor point, relaxed bow grip, and clean release while showing which parts of the shot need attention.
Start at a distance where you can shoot safely and stay in control. Keep practice sets short, follow the range rules, and focus on one skill at a time. These basic archery drills work with common beginner equipment and do not require special training aids.
Start with Safety and a Consistent Setup
Before practicing any archery drill, confirm that the range is clear, your equipment is sound, and you can repeat the same pre-shot routine. A consistent setup makes practice safer and helps you tell whether a change in your form affects your arrows.
Follow the range’s instructions and shoot only when authorized. Everyone should remain behind the safety line until the range is declared clear. Never nock or draw an arrow unless you are facing the target and the downrange area is safe; never point a drawn bow at another person. Retrieve arrows only when shooting has stopped and the range permits it.
Check your bow, string, arrows, and target before shooting. Do not use damaged equipment, and make sure arrows are suitable for your bow. If you are unsure about setup or draw weight, ask a qualified instructor or experienced range staff member before continuing.
Use the same simple pre-shot sequence each time:
- Stand at the marked shooting line and set your feet.
- Nock the arrow only when the range is open.
- Raise and draw the bow with control.
- Settle into your anchor point, aim as appropriate for the drill, and release smoothly.
- Follow through, then lower the bow safely.
Keep the routine calm rather than rushed. If your posture, grip, or attention feels unsettled, let down safely instead of forcing a shot.
Blank-Bale Drill for Form
Blank-bale shooting lets you practice shot execution at close range without focusing on a small aiming point. It helps beginners notice their stance, bow grip, draw, anchor, release, and follow-through without the distraction of scoring.
Use this drill only at a range-approved distance and target setup. A blank bale is a suitable backstop designed to stop arrows; it is not an excuse to shoot without a safe target area. Follow local range rules, check that the bale can safely stop your arrows, and make sure no one is downrange.
- Choose a close, comfortable target distance and stand at the shooting line.
- Look at a broad area of the bale rather than trying to center a tiny spot.
- Shoot a small set of three to five arrows using your normal sequence.
- Pay attention to one detail, such as a relaxed bow hand or a steady anchor.
- Pause and reset before the next set. Stop if your form becomes strained.
Do not close your eyes while shooting. Keep your attention on safe direction and controlled execution. The benefit of the drill is reduced aiming pressure, not reduced awareness. Blank-bale work can reveal a flinch, a collapsing bow arm, or a rushed release, but it will not tell you how well you aim at a target. Add target practice after your form feels repeatable.
Stance and Alignment Drill
A stance and alignment drill builds stable footing and posture before you draw. Practicing these pieces first can reduce unnecessary movement and give your bow arm a steadier base.
At the shooting line, place your feet in a comfortable, balanced position, usually about shoulder-width apart. Follow the range’s guidance on stance and keep your weight distributed evenly. Stand tall without locking your knees or leaning backward. Your shoulders should feel relaxed rather than lifted toward your ears.
Before nocking an arrow, rehearse the setup with the bow lowered: check your foot position, soften your knees, and turn your body into your usual shooting alignment. If your range permits dry practice, do it only with an unloaded bow and under the range’s rules. Do not draw or release a bow without an arrow unless your manufacturer and instructor specifically confirm that it is safe for your equipment.
Then shoot a set of three arrows at a safe, comfortable target distance. Between arrows, return to your starting position and rebuild your stance instead of shuffling your feet while holding the bow. Notice whether your bow arm stays steady and whether your upper body turns or tilts as you draw.
Common mistake: changing foot placement after every arrow to chase the last impact. That makes it harder to identify a pattern. Keep your stance consistent for the set, then adjust only if the position is uncomfortable or unstable.
Anchor-Point and Release Drill
An anchor-point and release drill helps you reach the same full-draw position and let the string go smoothly. A repeatable anchor gives your aiming process a reliable reference; a controlled release helps avoid disturbing the bow at the moment of the shot.
Choose an anchor point that fits your bow and instruction, such as a repeatable contact at the face. Avoid copying someone else’s anchor without checking that it suits your equipment and technique. At full draw, use the same gentle contact each time, keep your head in a natural position, and avoid pressing your face hard into the string.
- Shoot three to five arrows at a close, safe distance.
- Settle at full draw and confirm the same anchor contact before releasing.
- Let the release happen smoothly, without plucking the string or opening your hand abruptly.
- Keep your bow arm directed toward the target through the shot, then lower the bow under control.
If you use a compound bow, follow the release-aid and bow-specific instructions you were taught. Recurve and traditional bow techniques differ, so do not force one style onto another. A phone video taken from a safe position, with permission at the range, may help you notice changes in anchor or posture. Ask an instructor to review it if you are uncertain.
Stop if you cannot hold full draw comfortably. Excessive strain can change your anchor and lead to rushed shots. The drill should build repeatability, not endurance at the cost of safe control.
Grouping Drill at a Comfortable Distance
A grouping drill shows how consistently your arrows land at one target distance. Shoot small, repeatable sets before moving farther away; a tight group away from the center usually tells you more about consistency than scattered arrows do.
Pick a target distance where most arrows land safely on the target. Use the same target face, aiming point, and setup for each set. Shoot three arrows, then stop and inspect the group only when the range is clear and arrow retrieval is allowed. Record where the arrows land and how wide the group is, rather than judging a single shot.
Repeat for two or three sets if you remain comfortable and your form stays steady. If the arrows spread widely, stay at that distance and return to the form drills. When groups become more consistent across sessions, increase the target distance in a small step, following the range’s markings and guidance. A longer distance makes small form errors more visible, but it also makes misses harder to retrieve and can create frustration if you move back too soon.
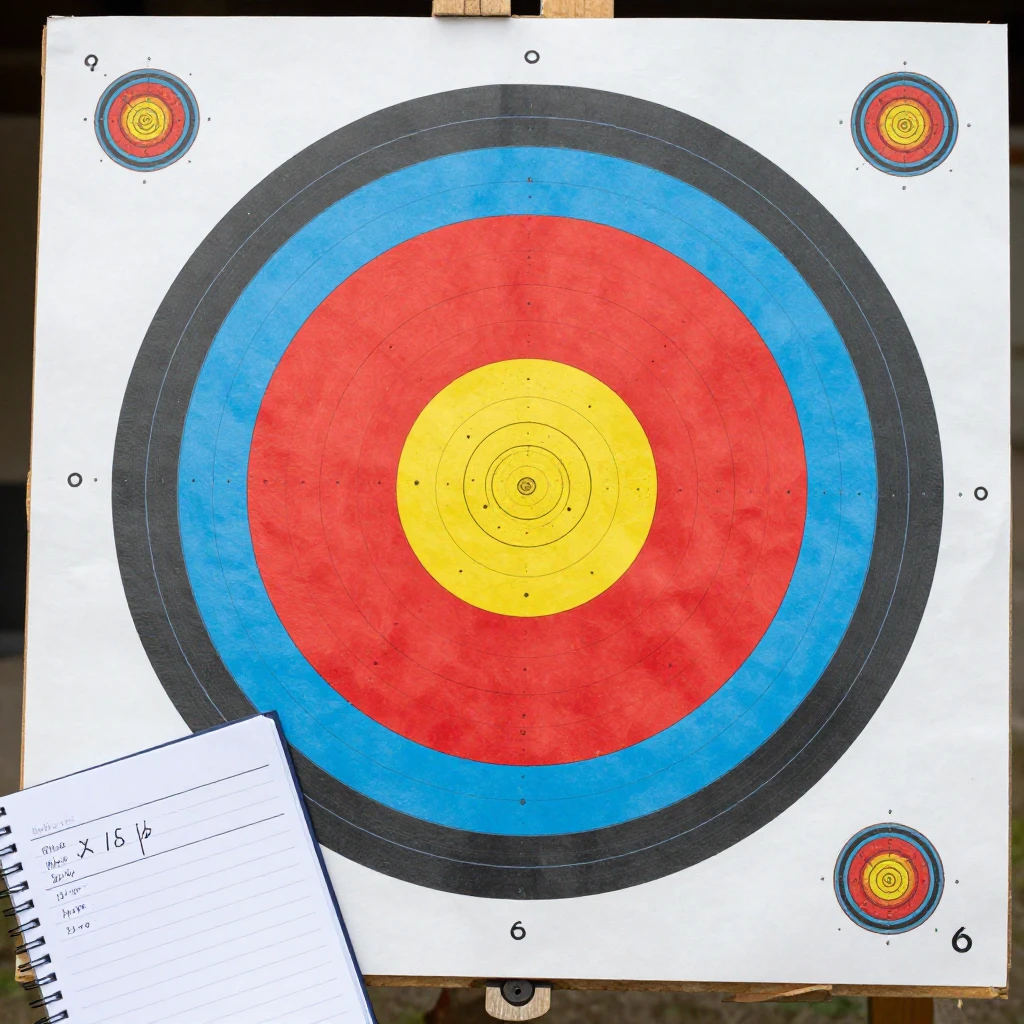
Do not adjust your sight after every arrow. First establish a repeatable group. If the group is consistently offset, check equipment setup and ask a coach or qualified range staff member to help distinguish sight adjustment from a form issue.
Track Progress and Adjust One Thing at a Time
Track each practice with the date, target distance, number of arrows, group pattern, and one form cue. Changing one element at a time makes it easier to see what helps and prevents you from rebuilding your shot after every session.
A simple notebook entry might read: “Tuesday, close distance, three sets of three; groups stayed low and left; focus next time: relaxed bow grip.” Record observations rather than labels such as “bad shooting.” A repeated pattern is useful information. One stray arrow may come from a lapse in attention, while several arrows landing in the same area may point to a consistent alignment, aiming, or equipment question.
Use this order when diagnosing a problem:
- Check safety and equipment: confirm the bow and arrows are undamaged and correctly set up.
- Review repeatability: compare stance, bow grip, bow arm, anchor point, and release across shots.
- Change one cue: focus on a single adjustment for the next short set.
- Reassess the group: keep the change only if it feels controlled and the pattern becomes more consistent.
Accuracy develops at different rates. Avoid increasing arrow count simply because a session feels unproductive; fatigue often makes form less consistent. Short practice with clear attention is more useful than a long session of rushed shots.
FAQ
Beginners can use these answers to plan practice volume, choose a target distance, and respond to arrows that miss the intended point. Follow your range’s rules and seek qualified help if a form or equipment issue is unclear.
How often should beginners practice these drills?
Practice regularly at a pace you can maintain, such as one or two sessions a week to start. Consistency matters more than a rigid schedule. Take a break if you feel pain, unusual fatigue, or difficulty maintaining safe form.
How many arrows should I shoot in one session?
There is no single right number. Start with a few short sets, such as three arrows per set, and stop when your focus or form begins to fade. Your coach, range rules, physical comfort, and equipment should guide the total.
When should I increase the target distance?
Increase distance when you can repeatedly keep your arrows on the target and your groups are reasonably consistent at the current distance. Move back a small amount, then reassess rather than making a large jump.
What should I do if my arrows are consistently off target?
First check that your feet, anchor, grip, and release are consistent. If the group is tight but offset, the issue may involve aiming or equipment setup; if arrows are spread out, return to a close-range form drill. Ask an instructor or range staff member to help before making major adjustments.